Editing Dating Profile Photos: Keep the Moment Intact
Make the useful moment easier to read without losing what makes it interesting.
Edit a dating photo to make its best moment easier to understand. Start with the expression, activity or connection you want to keep, then fix whatever gets in the way. A brighter face can help; removing the atmosphere, smoothing away every detail or blurring the people around you can leave a less interesting picture.

Decide what the edit is supposed to improve
Rohan's venue photo has a strong purple cast. It also has two easy-to-read smiles and people standing close together. The color helps explain the night out. Making the scene look like daylight wouldn't automatically make it a better dating photo.
Before opening the sliders, finish this sentence: “I want this change to make it easier to see…” Your expression, a gesture or the activity are useful answers. “I want it to look more edited” isn't a reason to keep going.
Save a copy so you can compare with the starting image. Make one adjustment at a time. When several filters and changes pile up, it's harder to tell which one helped and which one removed something you liked.
Start with your strongest moment, not the picture that seems easiest to polish. Editing won't create a shared laugh in a frame where everyone looks distracted. If another photo already has the connection, it may be the better place to spend your attention.
Lift a shadow only as far as the photo can support
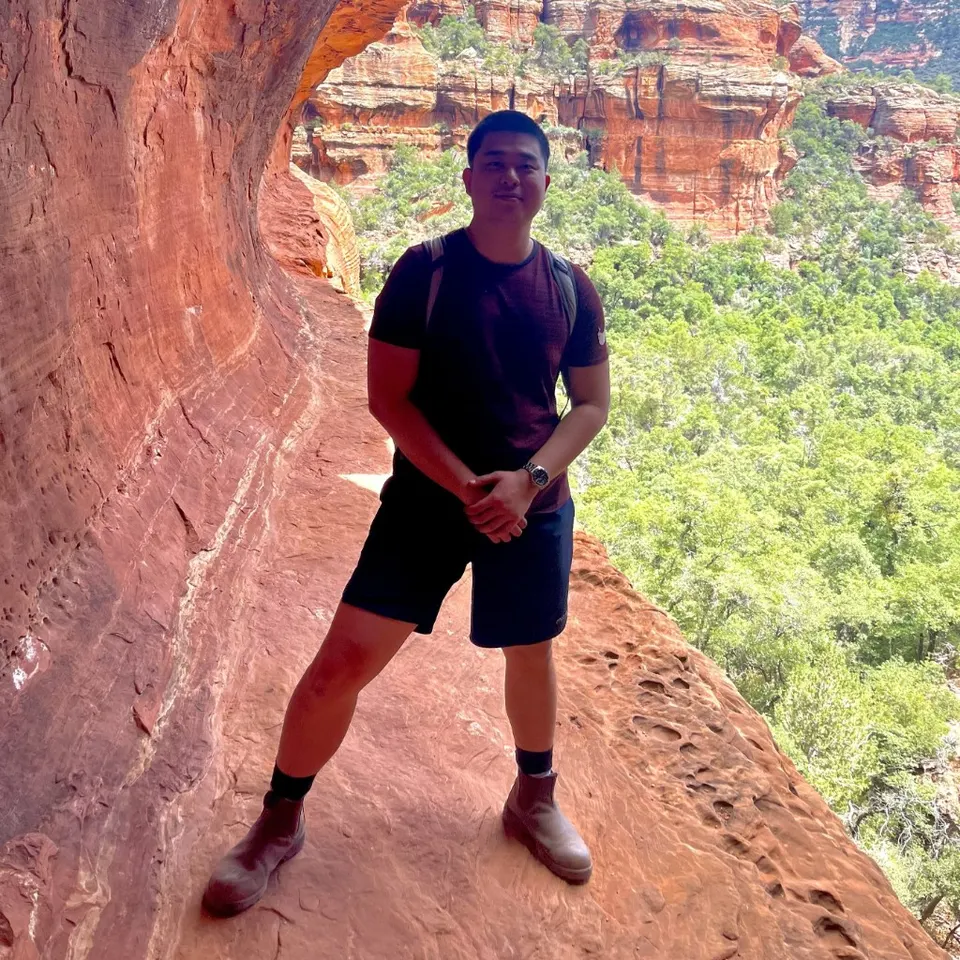
Jason's red rock photo shows the editing decision clearly. His face and shirt are shaded, while the landscape behind him is bright. The boots, backpack and rock opening still explain an outdoor adventure. You have a reason to keep the scene before touching its brightness.
If your editor offers a shadows control, try a small increase and compare the face with the original. Raising the brightness of the whole picture can also wash out the already bright surroundings. Watch both areas as you adjust, rather than judging the face in isolation.
Stop if the shadow starts to look flat, noisy or oddly colored without revealing a useful expression. A nearby frame with better light may solve the problem more cleanly. Sometimes the wider adventure scene remains useful as it is, with another photo making you easier to recognize. For your next outing, the lighting guide covers small changes to position that keep the moment readable before you edit.
Don't treat sharpening as a way to recover a moment that wasn't captured. It can make edges more pronounced, but it won't turn an unreadable expression into a reliable introduction. If softness is the main issue, use the blurry-photo guide to decide whether the moment still earns a place.
Does this edit help the dating photo?
- Name the problem
Choose one thing that makes the expression, activity or connection hard to read.
- Make one change
Adjust it while watching the people and setting you want to preserve.
- Compare at phone size
Keep the edit only if the useful moment comes through more clearly.
If you can't explain what improved, return to the earlier version.
Keep the people who give the background meaning

Chris's toast photo already separates him from the background, but the guests remain recognizable as an audience. The microphone, notes and people listening explain his role. Those details give the picture more dating-profile value than a face against an empty blur.
Before increasing background blur or removing something, ask what would disappear with it. A stray object at the edge is different from a friend reacting to you or equipment that explains your activity. The most visually tidy version can tell a weaker story.
If an edge detail distracts from you, try a modest crop first. Keep enough room for the interaction and check that hands, gear or other people haven't been cut awkwardly. The cropping guide covers that tradeoff in more detail.
A background can be busy and useful at the same time. In this example, the audience helps communicate a social role and a moment of responsibility. You don't need every guest to be sharp for that context to matter.
Use color to keep the mood readable
A warm dinner, a blue winter scene and a purple venue don't need to share the same color treatment. Your profile can look coherent because it's the same person with a recognizable life, even when the lighting changes.
If skin or clothing has an odd cast that distracts from the moment, test a restrained color adjustment. Compare it against the surrounding light. Removing every trace of warmth from a candlelit table can make the people feel disconnected from the room.
Be cautious with a strong preset that changes every picture in the same way. Look at what it does to smiles, shadow detail and the setting, not just whether the colors are dramatic. A black-and-white treatment is also a choice to compare, not an automatic upgrade. Keep color when it helps explain the scene.
Retouch the distraction, then stop
A temporary spot and the shape of your face are different editing decisions. Keep the features and proportions someone would recognize when meeting you. Repeated smoothing or reshaping can change the introduction instead of simply making the photo easier to read.
Zoom back out after any small correction. If the only improvement is visible while inspecting a tiny patch of skin, it probably isn't the part of the dating photo that needs your time. Put the edited version beside the original and read the whole scene again.
Finally, check the upload preview. Make sure the crop still includes what matters and that the expression works at phone size. Pick the version that makes your company, interests or role clearer, then move on to a different photo if the profile needs another side of you.